FAST and EASY Way To Cut Out Tree In Photoshop
In this tutorial, I’m going to teach you how to FAST and EASY Way To Cut Out Tree In Photoshop
The techniques that you’re going to learn in this tutorial could be used on anything, not just trees. These are very FAST and EASY techniques that you should know. Okay. Let’s get started.
FAST and EASY Powerful Methods To Cut Out Trees In Photoshop, I still think that it is a powerful method that you should know. Because it can be very beneficial in some cases.
Okay, let’s get back to the main topic. Click on the channels. You can see the three channels, Red, Green, and Blue.


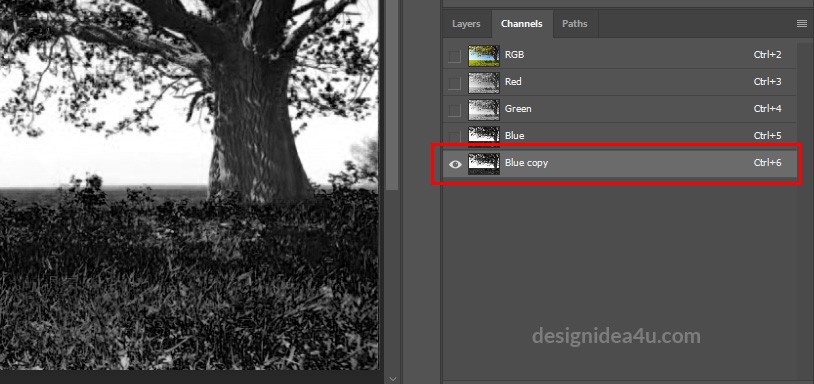
Click on this blue channel. What you need to do is look at the channel that has the most contrast between the foreground and background. In this case, the blue channel. The sky is brighter and the tree is dark. So all the relevant information the blue pixels are almost complete while this is what Blend If (FAST and EASY Powerful Methods To Cut Out Trees In Photoshop) was using. So, we were simply telling Blend If to use this as a reference for us to create the mask. So, it might be a bit more clear now that you see the channel but anyway. Select the blue channel, click and drag it into the new channel icon to duplicate this blue channel.

What you need to do now is make solid black and solid white. There’s a lot of ways of doing that. So, I’m going to show you several ways, and you use a technique that better works for your image. So, you can go to image, adjustment, and levels. Just make the darker pixels darker by dragging the black point to the right. And make the brighter pixels brighter by dragging the white point to the left and press okay.


Another thing that you can do is simply make a selection out of things that should be a solid color. Black is my foreground color. So I can press Alt and Backspace to fill with that color. You could also use the Apply Image command. So, you can go to Image and apply the image.


You can use the blue copied channel. Which is selected by default, and apply it to itself using a blending mode. In this case, a screen is selected or you can select Multiply.

I’ll select Multiply just to make those darker pixels darker and fill those areas in and press okay. Another thing that you can do is use the Dodge and Burn Tool. Select the Dodge Tool. Make sure that Highlights is selected, and you can paint to the highlights brighter. Make sure that there are no grays and it’s completely white. And you can select the Burn Tool. Make sure that Shadows is selected. And paint to the shadows darker.
And finally, you can use the Brush tool. And simply paint with black in areas that need to be black. So, you can use the combination of all those techniques to make sure that the areas that should be black. And the areas that should be white. So, what we need to do now is think about it. What we want to Select and what we want to Deselect. With a selection, white is selected, and black is not.
So, we want to select the tree and not select the sky. What we have here is the opposite. White is selecting the sky and not the tree. So, you can simply press Ctrl+I (Command+I on the Mac) to invert, and that inverts those colors.

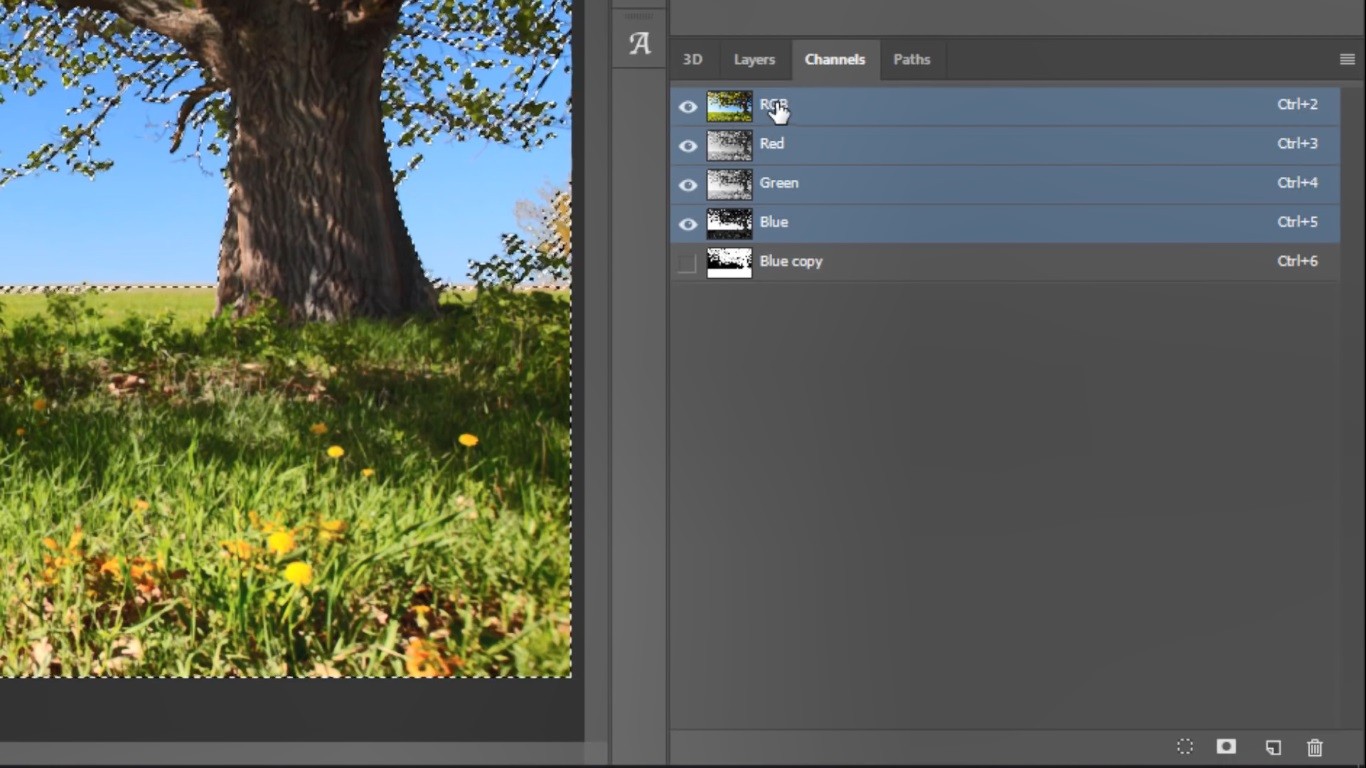
So now, the tree is selected and not the sky. Now, you need to make a selection out of the bright pixels. There are two ways of doing that. You can press Ctrl (Command on the Mac), and click on the layer thumbnail to make a selection.

You can look at the number next to the channel that you copied. If you only have one channel copied, then it’ll be Control+6. So, Control+Alt, and then that number. And by the way, if you wanted to select for example the red channel. You can press Ctrl+Alt+3 (Command+Option+3 on the Mac), to select the bright pixels out of that channel. But in this case, we want to select the blue copy, which is Ctrl+6. So, Ctrl+Alt+6 (Command+Option+6 on the Mac) with those pixels selected. I’m going to click on RGB. Go back into the Layers Panel, and simply create a layer mask. And now, we have selected the tree very very easily by using the channel’s panel.

And we can do really cool things like bring in this sunset overlay. Bring it below the image that we’re working with. And then I can create a curves adjustment layer on top of that layer, clip it to the layer below. So that we only affect the tree layer and not the background. And I can just start darkening the image to create a really cool effect. Then I can select the red channel. And I’ll click and drag from the center up to add more red light into this image to create this sunset effect.


You can also watch, How to Create SNOW in Photoshop – Make REALISTIC Snow In Photoshop
Thank you so much for watching.
